Assembly
Day 1
I cleared the driveway ready for the SIP lorry to arrive. It’s hard to visualise how much space you’ll need but &shed’s panels fitted comfortably onto my standard 1.5 car driveway. The lorry arrived around 9 AM and the four of us had the panels unloaded by 10 AM. We covered the panels in a couple of cheap tarpaulins, which is just as well because there were a few downpours that week.
Beforehand, I had bought a box of 500 4.5 x 50 mm outdoor rated wood screws and another of 4 x 40 mm passivated (but not outdoor rated) screws. These were for fixing through the OSB into the timbers and SIP splines where panels met. The manufacturer also supplied boxes of sizeable pro-struct screws, which we used for fixing the corners, anchoring the roof to the wall plate, etc. You’ll need a beefy drill or impact driver to send them home.
In addition to mechanical fixings, we used glue and foam on every joint. This gets messy but should ensure a good airtight junction. I was relying on the building to be airtight in order to keep the heating requirements low enough for the valve amp.
Building the Base
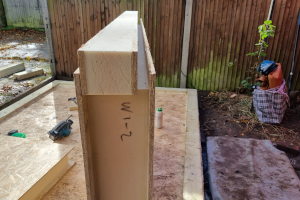
After unpacking the lorry, we started on the base. The base was made with 90 mm panels, so we were able to assemble it lying flat, screw from above, and then hinge it upwards to screw from below. An alternative, if you have a larger base or fewer hands, would be to assemble standing up, allowing you to screw from both sides, and try to lower into the final position. I suspect a winch or something would be essential for safety.
The Walls
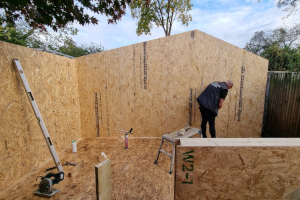
Some walls go together with splines and others with timbers, depending on the load. Either way, the walls go up quickly. One minor faux pas involved us cutting the floor plates a little long and gluing down the floor plate where it crossed the door opening. A little more thought on our part, or a little more detail in the plans, would have avoided that.
Day 2
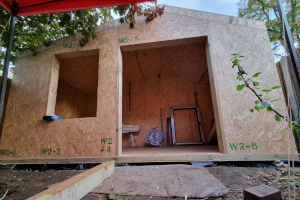
We constructed the roof. Not a lot to say except that roof panels are heavy. We tried pushing the panel up from the inside and from the outside, with the inside the clear winner. We attached spare timber to the side walls to stop the roof panels (and us) sliding off.
With the final panel on, we went around making sure we had screwed everything sufficiently and pulled a large tarp over the whole shell, securing with tent pegs and bungees. Although OSB is probably fine in the rain for a few days, I’m really glad we took the time to fit the tarp.
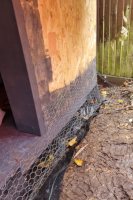
To protect against any rain that made its way under the tarp, I put a coat of some spare fence paint around the bottom of the exterior walls. To guard against small mammals, I stapled a roll of chicken wire around the shed, extending down to the ground. It would have been more secure to bury the wire a short way into the ground but I realised that excavating a narrow trench around the whole perimeter was going to be impossible so it simply sits on the ground.
Thoughts
It’s great to see the building come together so quickly. After two days, the shell was done and was dry enough inside to leave some tools and materials. Only now did I put in the order for the doors, once I could check the exact dimensions of the openings.
Tools Used
- Cordless drill
- Impact driver
- Circular saw
- Mitre saw (not essential)
- Tape measure
- Spirit level
- Spray foam gun
Player of the Match
The laser level because everything downstream is easier if you can make the shell square and plumb. An honourable mention, too, for the big tarp.
What I’d do Differently
Don’t wear any clothing that you like and keep eye protection on at all times. The spray foam and expanding glue will get everywhere. On gloves, glasses and clothing, in hair, on tools, screws and shoes. Everywhere.


